Subscribe to our newsletter today
Lorem ipsum dolor sit amet consectetur adipiscing eli mattis sit phasellus mollis sit aliquam sit nullam.

Complete guide to RV moisture and condensation control — ventilation strategies, daily habits, dehumidifier use, seasonal moisture management, winter storage protocols, and how to identify and treat existing moisture damage.
Venenatis sollicitudin posuere elit consequat et enim. Neque tortor amet dictum tempor. Leo facilisis aliquet viverra scelerisque eleifend viverra est. At massa erat vel amet enim laoreet dictum pellentesque. Urna cursus quam pulvinar tellus. Duis fermentum nibh volutpat morbi. Et ac sed ultricies ut nunc sodales lectus.
Et urna ac et maecenas fusce amet. Nibh nec commodo massa sed. Tincidunt porttitor in pharetra egestas sit neque ac lacus. Amet a nunc et cum. Odio at volutpat volutpat in leo eget ipsum diam elementum. Erat magna arcu orci lorem senectus orci fringilla. Tincidunt metus nisl vitae maecenas pretium aliquet.
Quis faucibus massa sit egestas. Sit fermentum est ac pulvinar et sagittis sed sit ut. Quis faucibus aenean nibh vestibulum enim mi sit. Sollicitudin ultrices ultrices in ipsum urna fringilla massa leo. Sapien ultricies vitae rhoncus molestie purus. Urna urna dolor euismod porttitor et. Magna adipiscing dictum et adipiscing mollis feugiat.

Quis faucibus massa sit egestas. Sit fermentum est ac pulvinar et sagittis sed sit ut. Quis faucibus aenean nibh vestibulum enim mi sit. Sollicitudin ultrices ultrices in ipsum urna fringilla massa leo. Sapien ultricies vitae rhoncus molestie purus. Urna urna dolor euismod porttitor et. Magna adipiscing dictum et adipiscing mollis feugiat.
Cursus curabitur euismod vel fermentum sapien non dolor odio vel. Tortor lectus mauris in praesent a tincidunt nam. In aenean odio aliquet pretium viverra elit quis magna. Eget ut risus posuere velit purus nisi nec sollicitudin. Tellus enim interdum neque sit vestibulum lacus. Nam pulvinar a lectus justo aliquet integer amet.
“Sed id mi eget urna facilisis pharetra nunc viverra est at magna maximus consectetur sed nec maximus augue aliquam commodo sem eu.”
Cursus curabitur euismod vel fermentum sapien non dolor odio vel. Tortor lectus mauris in praesent a tincidunt nam. In aenean odio aliquet pretium viverra elit quis magna. Eget ut risus posuere velit purus nisi nec sollicitudin. Tellus enim interdum.
Sed non quis tellus velit orci. Quam sed mauris elementum tempor viverra. Luctus semper risus ipsum id diam praesent. Pretium eget mauris ultrices curabitur sed sem amet. Erat nulla habitant in mattis massa mi adipiscing ullamcorper condimentum. Erat quisque integer tincidunt ac amet tempor vulputate tristique.
Sed non quis tellus velit orci. Quam sed mauris elementum tempor viverra. Luctus semper risus ipsum id diam praesent. Pretium eget mauris ultrices curabitur sed sem amet. Erat nulla habitant in mattis massa mi adipiscing ullamcorper condimentum. Erat quisque integer tincidunt ac amet tempor vulputate tristique.
Sed non quis tellus velit orci. Quam sed mauris elementum tempor viverra. Luctus semper risus ipsum id diam praesent. Pretium eget mauris ultrices curabitur sed sem amet. Erat nulla habitant in mattis massa mi adipiscing ullamcorper condimentum.
Moisture doesn't announce itself. It starts as a thin film on the windows in the morning. A slightly musty smell after a week of rain. A soft spot in the wall you almost don't notice. By the time moisture damage is obvious in an RV it's already structural — delaminated walls, rotted wood framing, mold behind the paneling that requires a gut job to fix properly.
The good news is that moisture in an RV is almost entirely preventable. It doesn't require expensive equipment or complicated systems. It requires understanding where moisture comes from, where it goes, and the simple daily habits that keep it from accumulating.
This is everything you need to know.
Where RV moisture comes from
Before you can control moisture you need to understand what's generating it. In an RV there are four primary sources:
Human activity — every person in your RV generates approximately one liter of moisture per day through breathing alone. Add cooking, showering, and dish washing and a two-person RV generates 3–5 liters of moisture per day that has to go somewhere. In a house that moisture escapes through gaps, attic ventilation, and the general looseness of residential construction. In an RV it has nowhere to go unless you actively move it out.
Cooking — boiling water, simmering soups, and anything that generates steam puts significant moisture directly into the RV air. A pot of pasta releases more moisture than most people realize — and in the enclosed space of an RV kitchen that moisture hits the windows and walls immediately.
Showering — the most concentrated single moisture event in an RV. A 10-minute shower releases a large amount of steam into a small enclosed bathroom. Without adequate ventilation that moisture migrates throughout the rig.
Outside air — in humid climates like Florida, the Gulf Coast, and the Pacific Northwest, outside air brought in through windows, doors, and ventilation carries significant moisture with it. On a humid morning when the outside dew point is high, opening your windows to "air out" the rig can actually make the moisture situation worse.
Ground moisture — in humid climates, moisture wicks up from the ground through the underbelly of the RV. Less common but worth knowing about for rigs that sit on wet ground for extended periods.
Where moisture goes — and why it's a problem
Warm air holds more moisture than cold air. When warm moist air inside your RV contacts a cold surface — a window, an exterior wall, a metal cabinet frame — it releases that moisture as condensation. That condensation sits on the surface, wicks into adjacent materials, and over time creates the conditions for mold and structural damage.
The areas most vulnerable to moisture damage in an RV:
Windows and window frames — the most visible condensation surface. The moisture itself isn't the problem — it's when it runs down into the window frame and sits in the seal that damage begins.
Exterior walls — the wall cavity between your interior paneling and your exterior fiberglass or aluminum skin is a cold surface in winter. Moisture that migrates into the wall cavity condenses there, saturates the insulation, and begins the delamination process that destroys RV walls.
Roof — moisture that gets into the roof structure accelerates dramatically. A small roof leak combined with interior condensation can destroy a roof in a single wet season.
Under-bed and under-dinette storage — enclosed storage spaces with poor air circulation are prime mold environments. The floor-level location makes them cooler than the rest of the rig which means more condensation on the surfaces inside.
Bathroom — the highest single-space moisture concentration in the rig. Grout, caulk, and the areas around the shower surround are the first places mold establishes itself.
The ventilation foundation
Everything else in moisture control builds on ventilation. Moving air out of the rig is the primary mechanism for removing moisture — before it condenses on surfaces, before it migrates into walls, before it becomes a problem.
Roof vent fans
A quality roof vent fan — the Fantastic Fan and MaxxAir are the standard recommendations — is the single most important moisture control tool in an RV. Run it on exhaust mode to pull moist air up and out of the rig.
The most effective pattern: run the roof vent on low exhaust overnight. This creates a continuous exchange of air through the rig — pulling the moisture generated by sleeping occupants up and out before it can condense on the windows and walls. The airflow is gentle enough not to disturb sleep and the moisture reduction is significant.
Bathroom vent fan
Run your bathroom vent fan during every shower and for a minimum of 15 minutes after. The shower is the most concentrated moisture event in the rig — the vent fan is specifically designed to handle it. If your bathroom vent fan is weak or slow, replacing it with a higher-CFM unit is a worthwhile upgrade.
Stove vent fan
Run the stove vent fan while cooking anything that generates steam — boiling water, simmering, frying. If your rig doesn't have a stove vent, crack a nearby window while cooking.
Cross ventilation
When the outside humidity is lower than the inside humidity — typically on dry sunny afternoons — open windows on opposite sides of the rig to create cross ventilation. The airflow carries moisture out faster than any single vent fan. Check the outside humidity before opening up — on a humid morning in Florida, outside air has more moisture than inside air and opening windows makes the situation worse rather than better.
Daily habits that make the biggest difference
Ventilation infrastructure matters but the habits you build around moisture are what determine whether your rig stays dry long-term.
Wipe down windows every morning
The condensation on your windows in the morning is the visible indicator of overnight moisture accumulation. Wipe it down with a microfiber cloth rather than letting it sit and run into the frames. It takes two minutes and prevents the frame seal damage that leads to water intrusion.
Never air dry laundry inside
Laundry drying inside an RV releases significant moisture into the air — a full load of laundry contains over a liter of water that has to evaporate somewhere. Dry laundry outside, at a campground laundromat, or in a dryer. If you must dry inside, run the roof vent fan on high exhaust the entire time.
Use lids when cooking
Keeping lids on pots while cooking dramatically reduces the steam released into the RV air. It also cooks food faster. Simple change, meaningful moisture reduction.
Crack a window when showering
If your bathroom layout allows it, crack a small window slightly while showering in addition to running the vent fan. The combination of exhaust fan pulling up and fresh air coming in through the crack moves moisture out faster than the fan alone.
Store wet gear outside
Wet rain gear, wet towels, wet hiking clothes, and wet swimwear brought inside the rig release their moisture into the RV air as they dry. Hang them outside under the awning, in a dedicated wet bag, or at the very least in the bathroom with the vent running.
Let cookware cool before putting it away
Hot pots and pans placed in enclosed cabinets release steam as they cool. Let cookware cool completely before storing it — the moisture released in a closed cabinet has nowhere to go and creates ideal conditions for mold on cabinet walls.
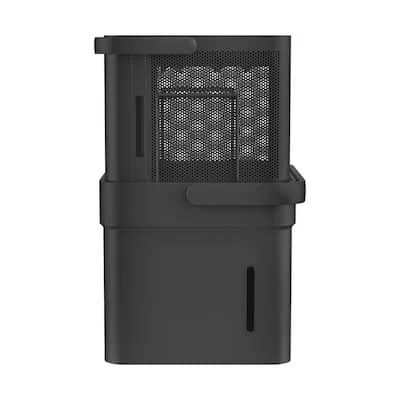
Dehumidifiers — where they fit in the system
A dehumidifier is the active moisture removal tool in your arsenal — it pulls moisture from the air after it's already been generated, before it can condense on surfaces and migrate into materials. It works best as part of a complete moisture management system alongside ventilation and daily habits rather than as a standalone solution.
For full-timers and long-term campers — a quality electric compressor dehumidifier like the Midea Cube running continuously is the most effective active moisture control available. The continuous drain feature means it operates without attention and the high capacity handles the output of full-time living.
For occasional campers in humid climates — a compact electric unit in the bedroom and a renewable silica option in the bathroom handles most situations without significant power draw.
For winter storage — a combination of the West Marine Seafit Cabin Dehumidifier running continuously and Eva-Dry renewable units distributed throughout the rig provides comprehensive passive protection.
For boondocking on solar — renewable silica options only. The Eva-Dry E-333 and E-500 draw zero power and work continuously in any enclosed space.
For specific product recommendations see our complete guide: Best RV Dehumidifiers for 2026 →
Moisture control by season
Moisture management looks different in different seasons and different climates.
Summer camping in humid climates
Summer in Florida, the Gulf Coast, or the Pacific Northwest is the most challenging moisture environment for an RV. Outside humidity is high, inside activity generates additional moisture, and the temperature differential between the air-conditioned interior and the humid exterior creates significant condensation on windows and walls.
Winter camping in cold climates
Cold weather creates the most dramatic condensation — the temperature differential between warm interior air and cold windows and walls is at its maximum. Every breath and every activity generates moisture that immediately finds the cold surfaces.
Spring and fall camping
The shoulder seasons are generally easier for moisture management — moderate temperatures and lower humidity make condensation less severe. The exception is spring camping in the Pacific Northwest and fall camping in the Southeast where humidity remains high.
Winter storage
A stored RV is a unique moisture challenge — no activity generating heat means the interior temperature tracks the exterior, and any moisture present in the rig when it goes into storage has months to work on every surface and material.
Pre-storage moisture protocol:
Identifying and treating existing moisture problems
If you're reading this because you already have a moisture problem rather than trying to prevent one, here's how to assess and address it.
Signs of active moisture damage:
Soft spots in walls or floors — press gently on wall panels and floor sections. Softness indicates moisture has penetrated the substrate. This requires professional assessment — soft walls often mean delamination has begun.
Visible mold — black, green, or white spots on walls, ceiling, or in storage areas. Surface mold can be treated. Mold inside wall cavities requires opening the wall.
Musty smell — the smell of mold and mildew before it's visible. Often concentrated in specific areas — follow the smell to the source.
Fogged or discolored window seals — moisture inside the double-pane window indicates the seal has failed. The window needs replacement.
Stained ceiling — brown water stains on the ceiling indicate either a roof leak or condensation running down from the ceiling surface. Probe gently to assess whether the substrate is soft.
Surface mold treatment
For surface mold on hard non-porous surfaces — tile, fiberglass, sealed wood, metal:
For surface mold on soft or porous materials — fabric, unfinished wood, carpet — the material typically needs replacement. Surface treatment on porous materials rarely eliminates mold at the root level.
When to call a professional
If you find soft walls, extensive ceiling staining, or mold in areas that require opening panels to access — call an RV repair specialist. DIY moisture damage repair done incorrectly can make the problem worse by trapping moisture behind new materials. A good RV technician can assess the extent of the damage and give you an honest repair estimate before you decide how to proceed.
The moisture control system — putting it together
Effective RV moisture control isn't a single product or a single habit. It's a system of overlapping practices that together keep moisture at manageable levels in any climate and any season.
The complete system:
Ventilation — roof vent fan running continuously on low exhaust overnight. Bathroom vent running during and after every shower. Stove vent running while cooking.
Daily habits — wipe down windows in the morning. Dry laundry outside. Use pot lids while cooking. Store wet gear outside. Let cookware cool before storing.
Passive absorption — Eva-Dry renewable units in every closet, storage bay, and enclosed cabinet. Recharge on a regular schedule — typically every 4–6 weeks depending on humidity levels.
Active dehumidification — an electric dehumidifier appropriate for your rig size running in the main living area when humidity is elevated. Continuous drain connected for long-term stays.
Seasonal adjustments — pre-storage protocol before every storage period. AC running in summer humid climates. Consistent interior temperatures in winter.
The RVers who never deal with moisture damage aren't lucky — they're consistent. The habits are simple and the equipment is affordable. The cost of prevention is a fraction of the cost of repair.
Start with the basics: a roof vent fan on exhaust overnight, an Eva-Dry in every cabinet, and a dehumidifier matched to your rig size. Build from there as you understand your specific moisture challenges.
Your rig will thank you for it.
Related gear: Best RV Dehumidifiers for 2026 → Best RV Wireless Internet Setups → RV Trip Checklist: 25 Must-Haves →
Lorem ipsum dolor sit amet consectetur adipiscing eli mattis sit phasellus mollis sit aliquam sit nullam.